Strain gauges are usually employed in force or torque transducer applications and stress analysis. Strain gauge based measurements may be installed on almost any material for verifying mechanical design component strength to structural monitoring of critical infrastructure.
In every instance, correctly installing a strain gauge is crucial to achieving the best measurement results possible.
Choosing the Right Strain Gauge
Choosing the most suitable strain gauge for an application is vital to acquiring the desired results, whether measuring stress on a metal component or incorporating strain gauges into an existing force or torque measurement.
Some strain gauges can supply the best possible transducer characteristics – low zero return, high linearity, and low creep, while others are best suited for precision stress analysis. Endless options can be narrowed down to a few of the best possible options by consulting with experienced application engineers.

Image Credit: Sensing Systems Corporation
Collecting the Materials Required
Correctly installing strain gauges requires compatible solvents and adhesives, precision tools, and some off the shelf tools.
Required materials include:
- Ruler and burnishing point tool like a ballpoint pen
- Precision tweezers to handle the strain gauges
- Kapton tape for holding the gauges in place
- Degreasing solvent for removing any oils or contaminants
- Glass plate for laying out the strain gauges prior to bonding
- Cotton tipped applicators and tissue paper for surface preparation
- 100 to 400 grit sandpaper for surface abrading
- Clamps or fixtures or for applying bonding pressure
- Adhesive for bonding the strain gauge to the test specimen
- Conditioning and neutralizing solvents for adhesive bonding
Laying out the Strain Gauge
When installing the strain gauge the first step is to remove it from the packaging carefully and secure it to a glass plate. Laying the gauge on glass enables the installer to position the gauge for the transition to the test specimen easily. First, glass should be cleaned using the tissue paper and degreasing solvent and the neutralizer should then be used to clean the glass.
A contaminated surface or bare hand must never come in contact with the strain gauge once it has been removed from the packaging. Introducing any dirt or oil may compromise the adhesive bond.
Apply a section of Kapton tape, which is slightly bigger than the strain gauge to the glass surface and peel it back in order to expose an area that is big enough to contain the gauge. Place the gauge securely against and under the tape using the tweezers, and then reapply the tape over the gauge, securing it to the glass.
The tape surrounding the gauge can be trimmed if it will interfere with the installation location on the test specimen but enough tape should be left on either end of the gauge to be able to handle the precision tweezers.
Preparing the Surface
The installation location on the specimen can be prepared for bonding once the strain gauge is secured to the glass and ready for the test specimen. First, to remove any contaminants from the surface, use tissue paper/cotton tipped applicators and the solvent degreaser.
This should be done in a sweeping motion with a fresh application each time, rather than back and forth, to make sure that contaminants are not transferred back onto the piece. To ensure adhesion after degreasing, the surface must be abraded. Depending on the material to which the strain gauge will be bonded this process can vary significantly.
Typically, an installation on machined metal involves wet sanding the installation location using 320 grit sandpaper together with a mildly acidic conditioning solvent until a surface finish of 32 μin is attained.
The solution helps with the cleaning process and it also lightly etches the surface which ensures a successful bond. The installation location can be marked onto the surface of the specimen at this point.
Apply two lines perpendicular to each other and centered on the desired gauge location using a burnishing point and ruler. Make sure that the tool does not scratch or score the surface of the specimen. Utilizing a scribe or blade tip can lead to a stress concentration or inconsistency at the bonding location which causes the adhesion to fail.
Wipe away any residual material using drops of conditioner and fresh cotton tipped applicators once the location lines are in place and the desired surface finish is achieved.
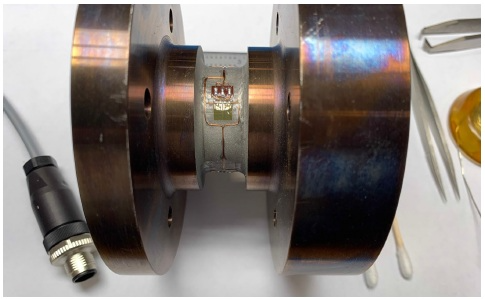
Image Credit: Sensing Systems Corporation
Wet the surface continuously with the conditioning solvent while wiping the residual material off the part until an applicator comes off the surface cleanly. Wipe the remaining conditioner from the surface after the last applicator is used.
Utilize the neutralizing solvent immediately to bring the surface alkalinity back to ~7 pH. Wet the cotton tipped applicator and surface and scrub the prepared surface completely. Once the surface has been dried with a piece of tissue paper and it will be ready for the strain gauge.
Bonding the Strain Gauge to the Test Specimen
Use the precision tweezers to peel the strain gauge and tape off the glass and place it on the specimen as soon as the surface has been neutralized. Align the center of the strain gauge grid carefully with the location lines previously marked on the part.
Use a cotton-tipped applicator to lightly press on the tape to ensure the gauge is secured in place. Prepare the bonding adhesive for application to the gauge and specimen. Peel back the tape to expose the strain gauge backing once the adhesive is ready to be utilized.
Apply the adhesive onto the test specimen surface and the gauge backing. With the adhesive in place, use the tweezers to position the gauge and tape back onto the bonding location. Bonding pressure can be applied onto the strain gauge once the adhesive is applied and the gauge is in position on the specimen.
Typically, room temperature fast curing adhesives can be performed by hand with a silicone gum pad to evenly distribute the pressure. Heat curing adhesives are required for optimum performance and long term installations.
The technique outlined in this article can be complex as the fixtures must apply a specified pressure onto the strain gauge while curing in an oven at a certain temperature.
Custom shapes to match the specimen gauge size and geometry along with spring loaded clamps are frequently utilized. In all cases, to ensure even pressure distribution, a thin silicone pad should be used between the fixture and the strain gauge.
Completing the Installation
When the adhesive is cured and the part is ready to be handled, carefully peel the tape off the strain gauge and specimen. To avoid breaking the bond and lifting the gauge off the surface of the specimen, pull it in line with the long edge of the gauge as much as possible.
Clean the gauge and surrounding area with acetone or isopropyl alcohol once the tape has been removed. The strain gauge is now installed and can be wired into a measurement circuit.
Strain Gauge Solutions from Sensing Systems
Sensing Systems carries out strain gauging courses at its laboratories and also at customer's facilities. Courses include basic theory together with actual installations on customer's components or equipment.
All of the materials and supplies needed to carry out installations are supplied. Specific strain gauging equipment can also be purchased through Sensing Systems to be utilized during the course and beyond.

This information has been sourced, reviewed and adapted from materials provided by Sensing Systems Corporation.
For more information on this source, please visit Sensing Systems Corporation.